
Create and Sell Merch
For more information on how Merch works, see the Merch reference.
Step 1: Create Merch in Shopify
Section titled “Step 1: Create Merch in Shopify”Example: Navy Tee
Section titled “Example: Navy Tee”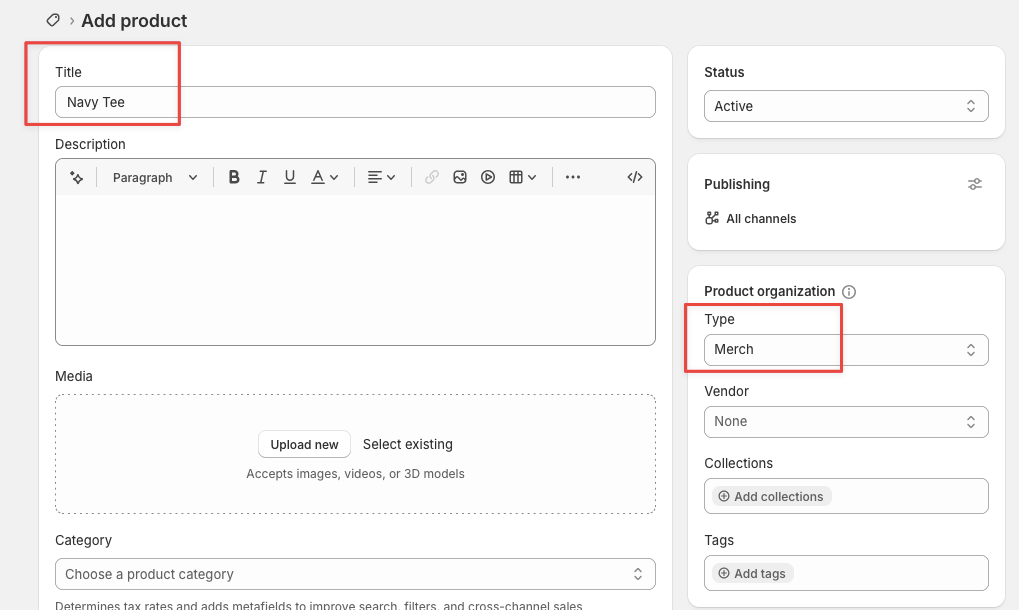
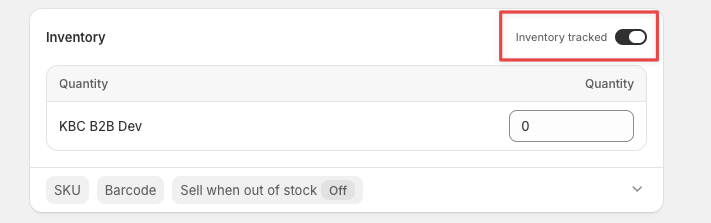
Track Inventory
Section titled “Track Inventory”To make sure you don’t oversell your stock, you can turn on Inventory Tracked option.
Variants
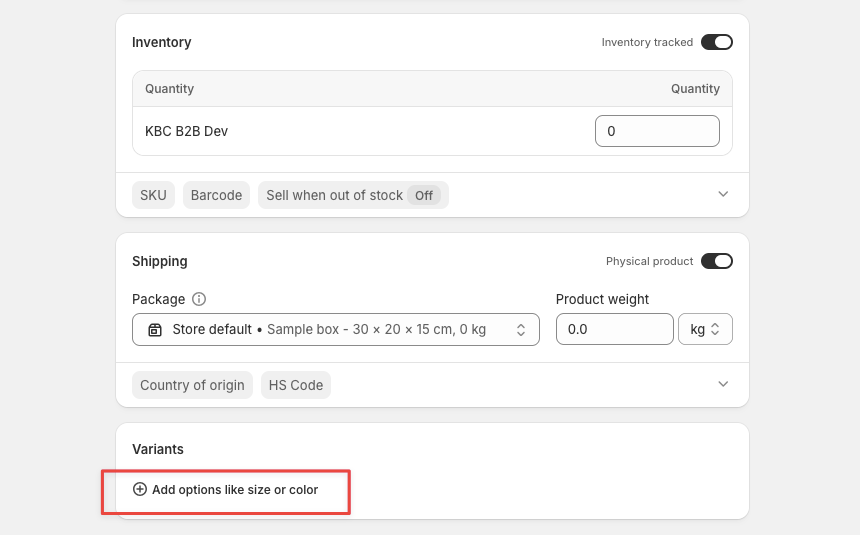
Section titled “Variants”Add options like Size or Color:
| Option Name | Option Values |
|---|---|
| Size | Small, Medium, Large, X-Large |
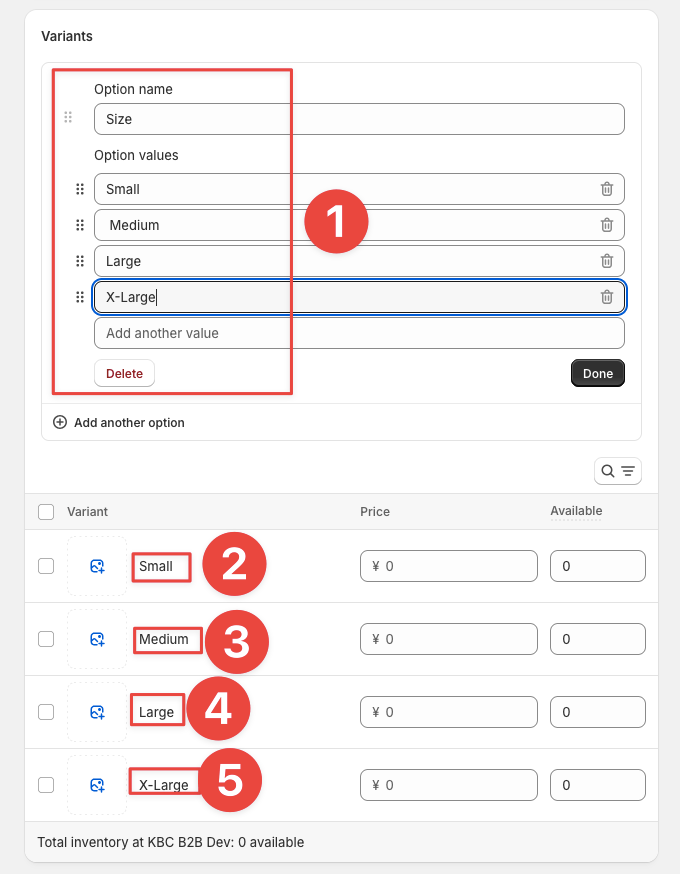
Click on each variant name that appears in the Variants section and set its SKU.
| Variant | SKU |
|---|---|
| Small | NT-000S-MS |
| Medium | NT-000M-MS |
| Large | NT-000L-MS |
| X-Large | NT-00XL-MS |
Where:
- NT = product SKU prefix (chosen because Navy Tee — must be the same for all variants in this product)
- 000S = S for Small, M for Medium, etc.
- MS = Merch Small (use
MSfor small merch,MLfor large merch). Small Merch can be configured to fit with beer and will not add extra shipping cost.
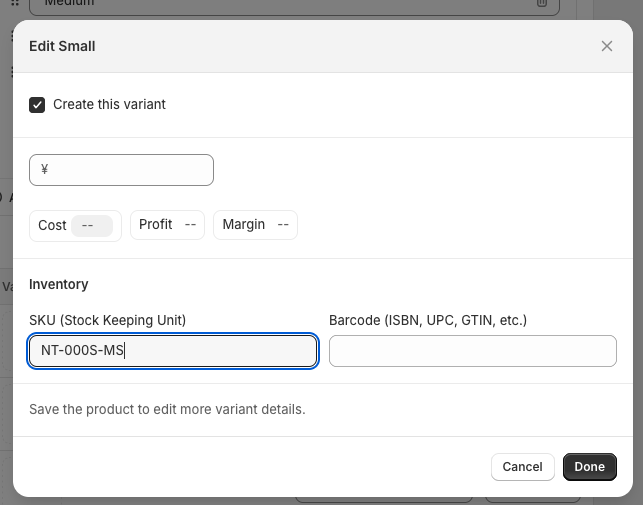
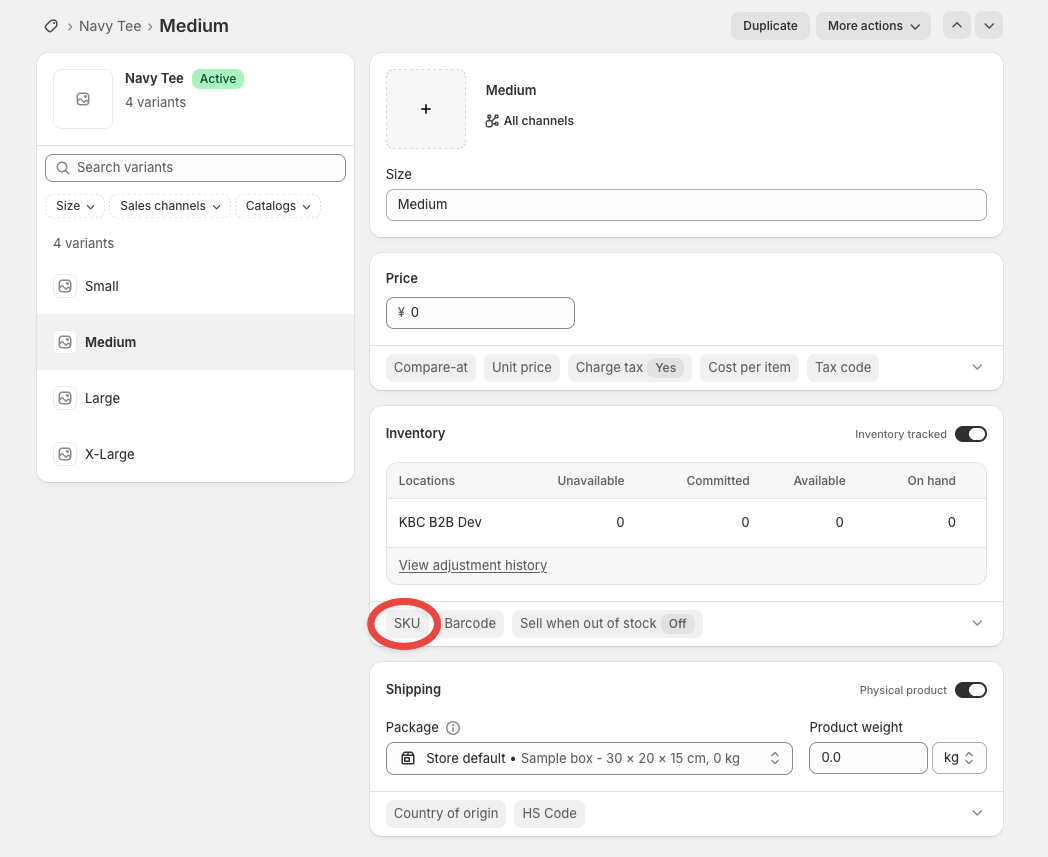
If you have already created the product, you can edit the SKU by clicking on the Size option name and finding SKU in the next screen.
Step 2: Fulfill Merch
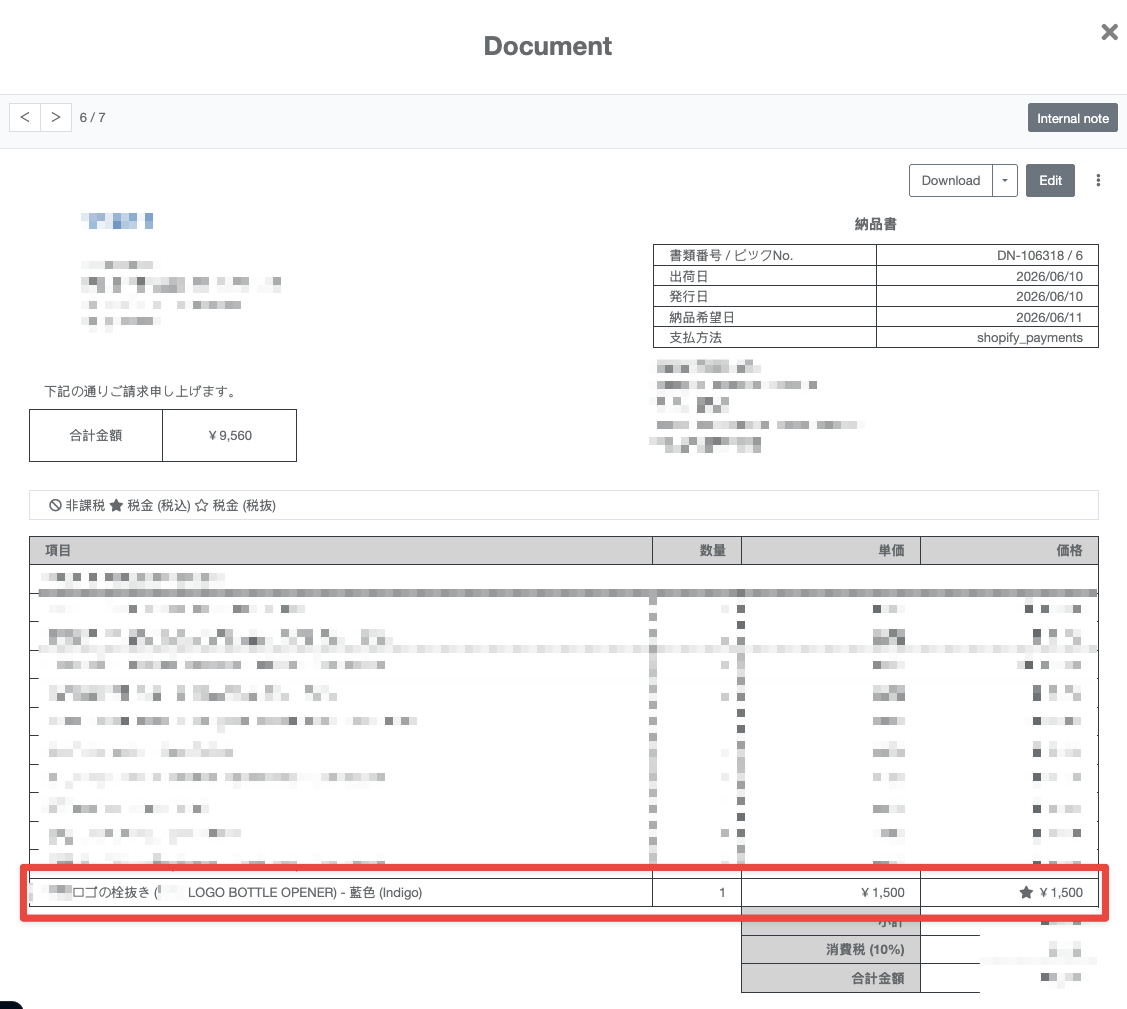
Section titled “Step 2: Fulfill Merch”The order created by the customer can now be added to the Dispatch Centre. The merch item will be fulfilled with the rest of the order and appear on the Delivery Note as well as the eHiden CSV.
For additional information on Merch, please see the Merch reference.