Sell, Allocate, Dispatch Kegs
This page describes the process of selling and shipping a keg in BrewKeeper.
The workflow below is the simplest case - one keg on an order, one order in a shipment. In practice, most workflows will be more complex.
1. Sell a Keg
Section titled “1. Sell a Keg”Kegs are sold via orders, which can be created by you or a customer. This step outlines how to create an order for a customer.
Create an Order
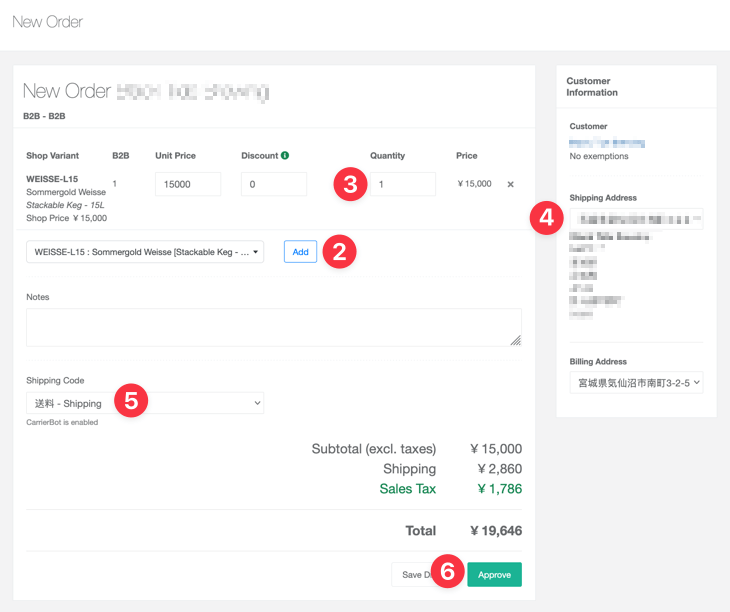
- Navigate to Sales & Distribution > Orders
- Click to create an order
- Click to Add a line item, enter a Quantity
- Select the Shipping Address and Billing Address
CarrierBot will only return rates with a valid Shipping Address - Select your Shipping Code
- Click
2. Allocate to the Order
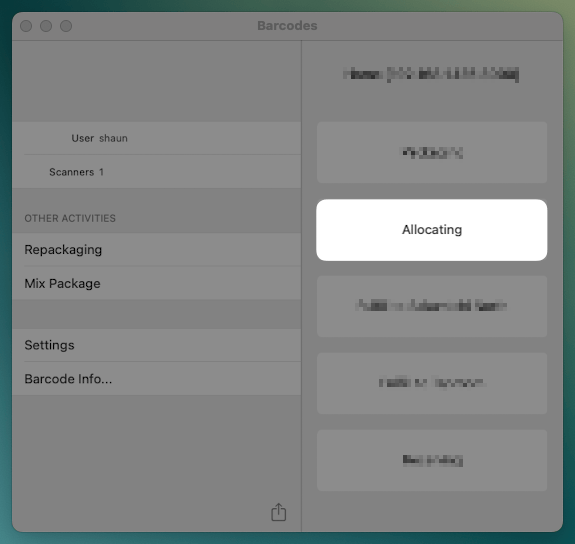
Section titled “2. Allocate to the Order”- Open the Allocating activity in the BrewScan iPad app
- Allocate the keg to the order
1. Open the Allocating activity in the BrewScan iPad app
Section titled “1. Open the Allocating activity in the BrewScan iPad app”Our iPad app BrewScan must be used to allocate kegs to orders.
2. Allocate the keg to the order
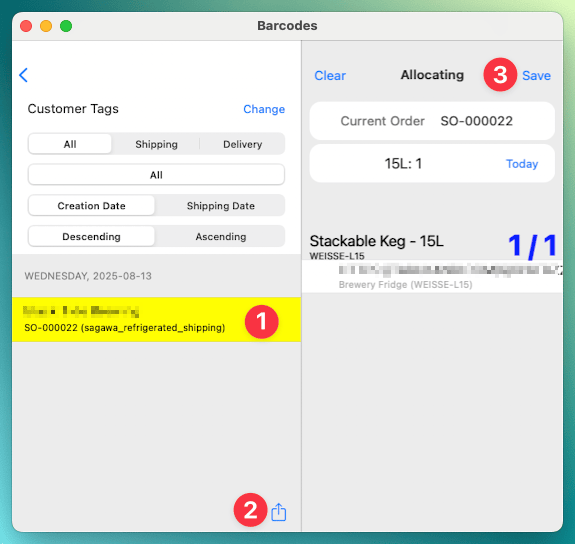
Section titled “2. Allocate the keg to the order”- Select the order you want to allocate
- Scan your keg
- Press Save
3. Create a Shipment
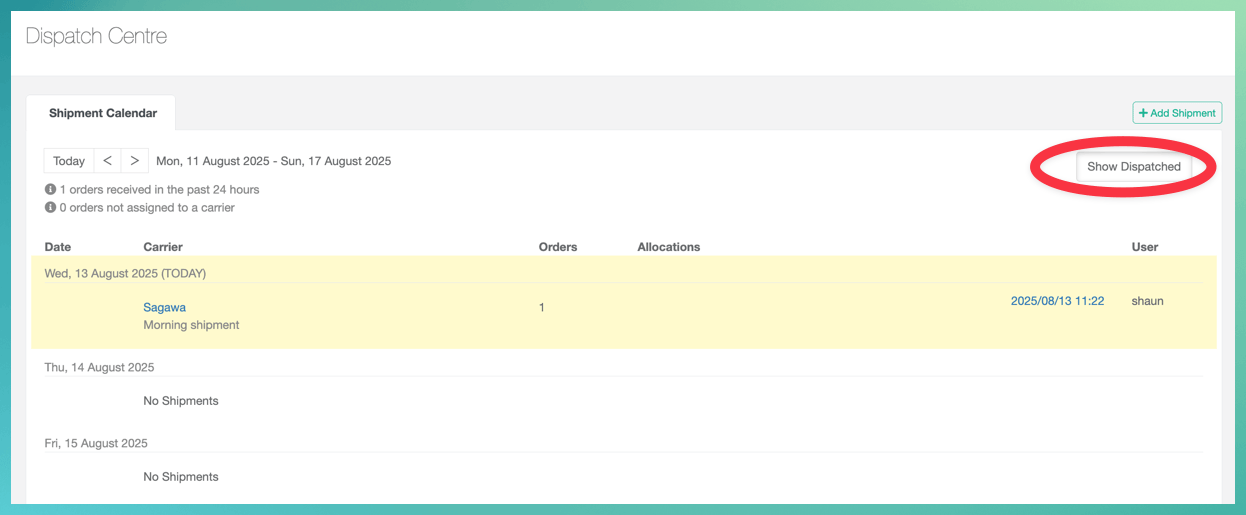
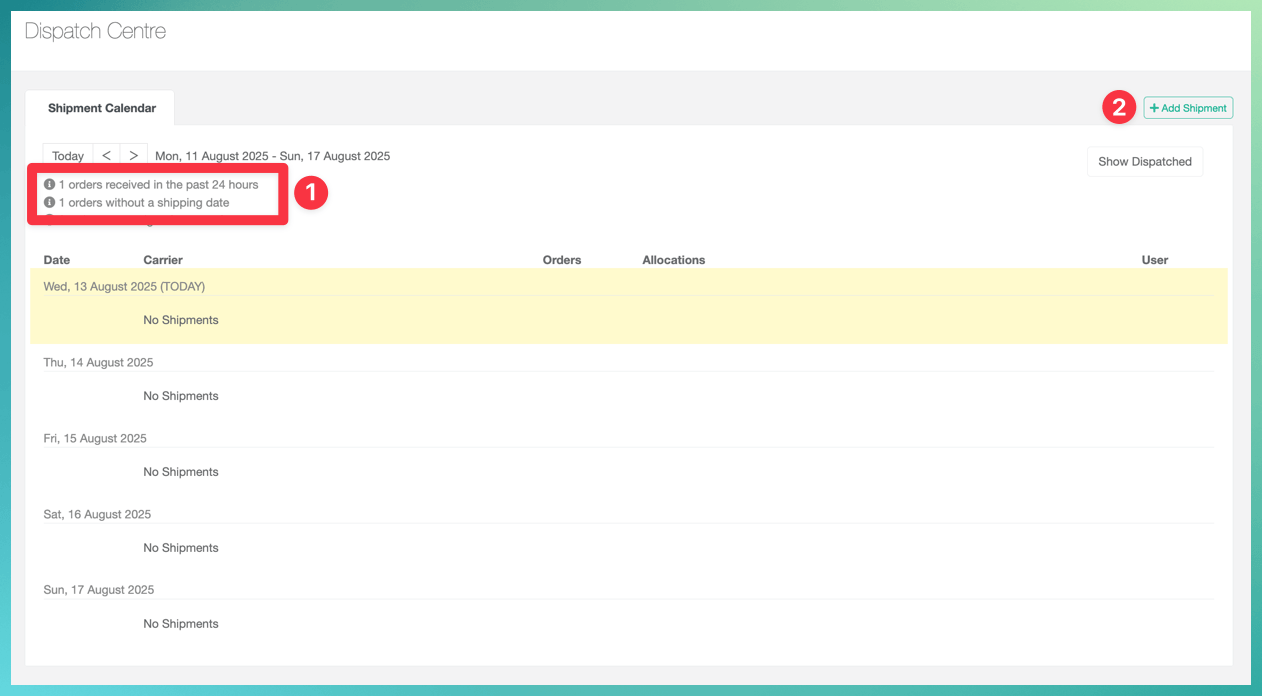
Section titled “3. Create a Shipment”The screenshot below shows the dispatch centre.
- A small summary displays some order statistics, this case
- 1 order created in the past 24 hours
- 1 order without a shipping date
In this scenario, the order has no shipping date because we haven’t set up our shipping lead times, which estimates when you should ship an order based on how long it will get to the customer.
The Dispatch Centre can work with orders without Shipping Dates, but Shipping Dates become necesary as you make more orders.
- An Add Shipment button, to create an ad hoc shipment.
Click the Add Shipment button.
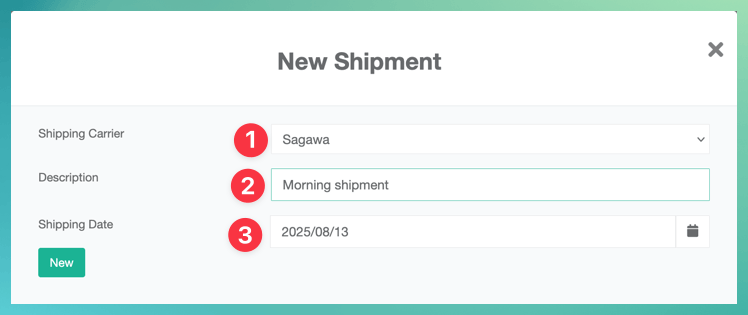
- Select your shipment type
Sagawa is common in Japan. BrewKeeper integrates with Sagawa to create your slips. - Optional Write a description to go with the Shipment
This is useful if you have many similar shipments in one day and you need a quick way to distinguish them - Select the Shipping Date
- Press
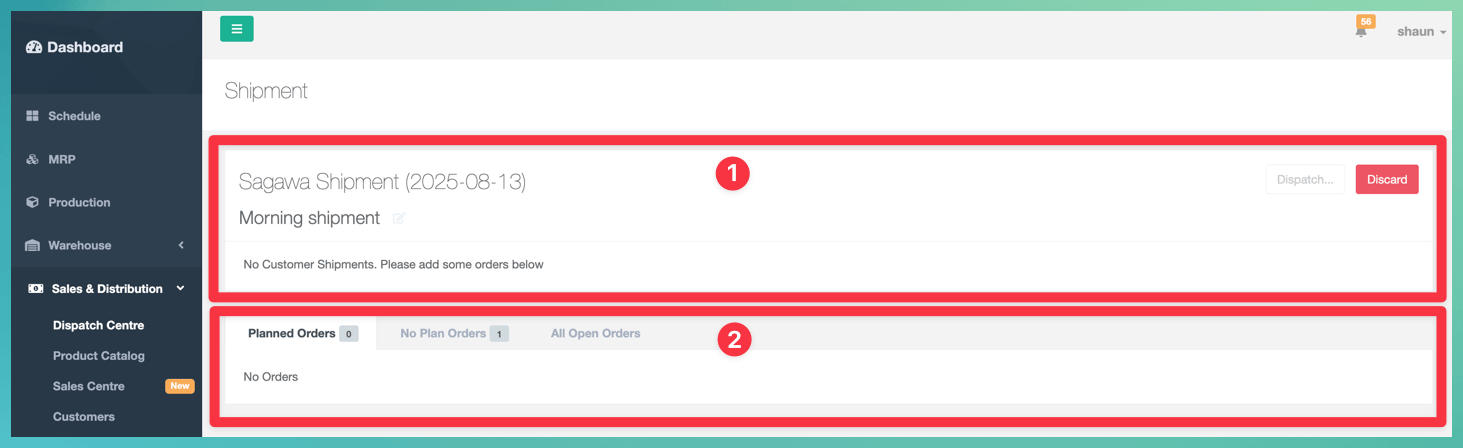
4. Add Order to Shipment
Section titled “4. Add Order to Shipment”There are two sections on a Shipment.
- Customer Shipments section. When you add an order, it shows in this area
- Orders section. You find your orders down here to add them to the Shipment.
”Planned Orders” and “No Plan Orders” both have badges displaying how many orders are present in their sections.
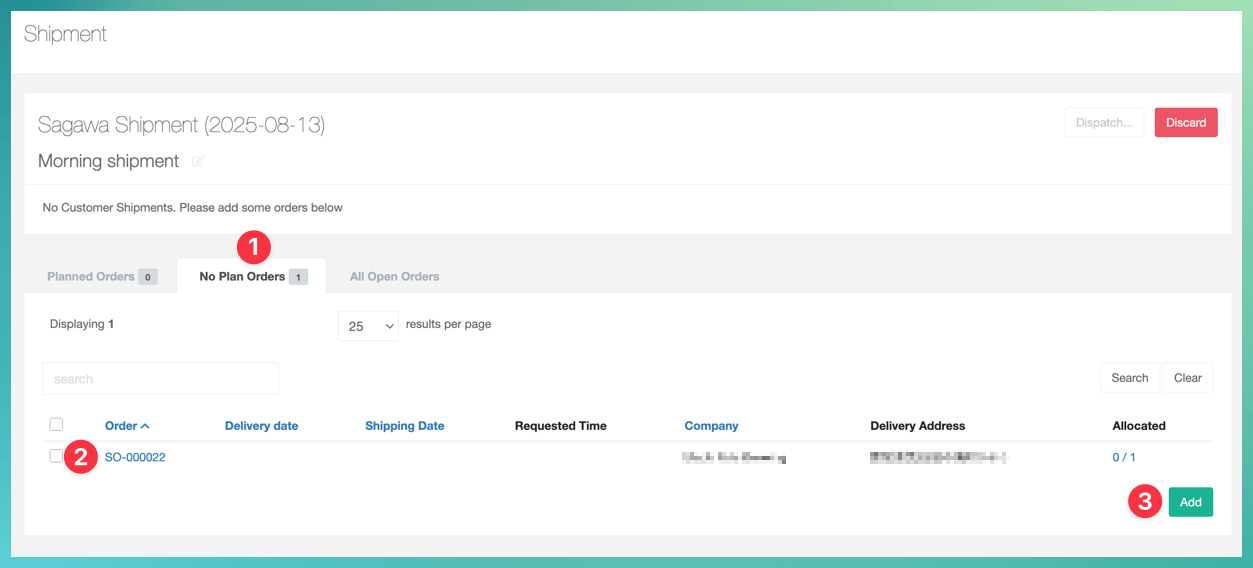
- Click “No Plan Orders”
In this scenario, the order has no shipping date, so it isnt planned to ship on any specific date, putting it in the “No Plan Orders” tab - Check the order
- Click
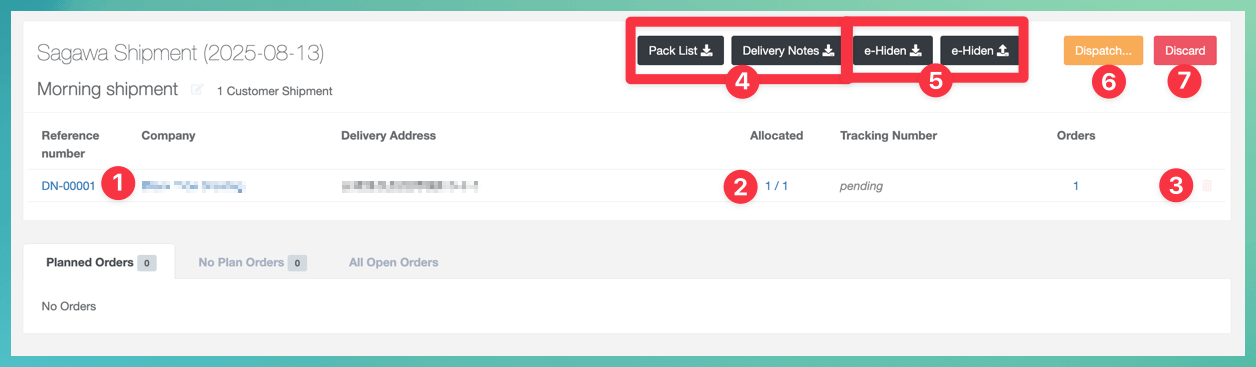
5. Dispatch Shipment
Section titled “5. Dispatch Shipment”Once you’ve added the order to the shipment, several options are available to the user
- Click the Delivery Note name to see a preview of the Delivery Note. You can also edit the Delivery Note
- A display of how how many allocatable items are on the order, and how many you’ve allocated. We allocated the keg in step 2, so we see here we have 1 of 1 order items allocated
- A delete button to remove the order from the shipment
- Download a Pack List (useful for cans, not so much kegs) and all delivery notes for this Shipment
- For Sagawa Shipments eHiden integration allows you to print Sagawa Slips and attach Sagawa Tracking numbers to customer shipments
- The button opens the Dispatch Summary page
- The button deletes the shipment
- Press the button to proceed
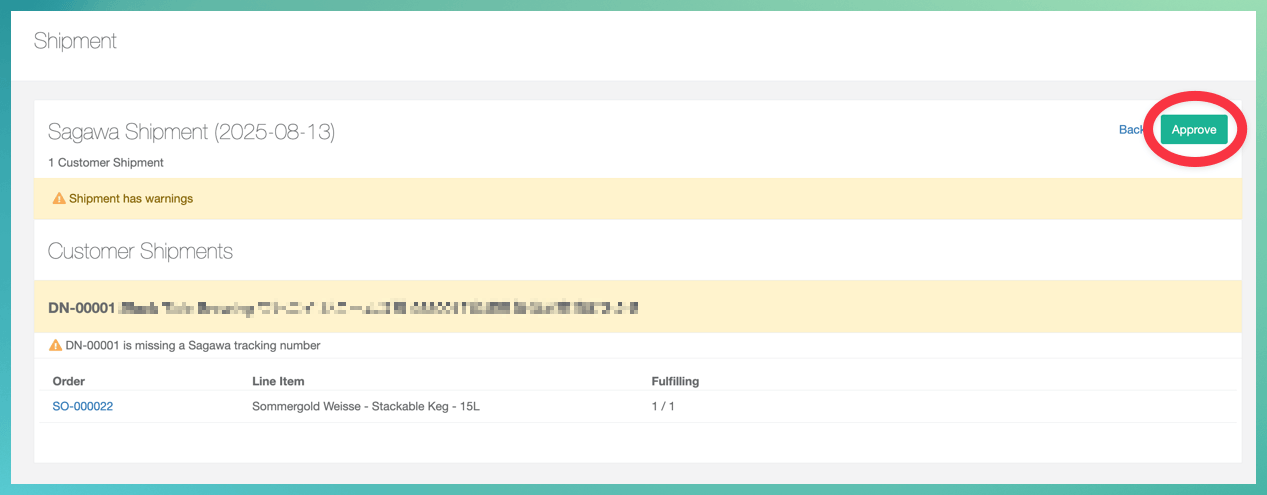
The Dispatch Summary shows you:
- Any warnings or errors to be considered before dispatching
- A summary of what is about to be fulfilled / dispatched
The example shipment has 1 warning - this is a Sagawa Shipment, and we haven’t attached a tracking number. Since this is only a warning, we can proceed.
- Press to approve dispatching the shipment
Once dispatched, you can show your dispatched shipments using the Show Dispatched button toggle.